[Last Updated: 2021-05-17 01:13:00 EST]
Warning: The following is just a guide on how to convert your Dapper Wallet balance into Canadian Dollars or other Cryptocurrency coins or tokens. I am not a financial advisor and I do not give any financial advise. If you want to convert your Dapper Balance to other crypto currencies, please do your own Due Diligence and research.
Referral Links:
Newton Exchange – https://web.newton.co/r/TLHIWK
Binance Exchange – https://www.binance.com/en/register?ref=12231617
Hello everyone. So, you’ve been participating in one of the hottest NFT (Non-Fungible Token) markets known as NBA Top Shot, but you have no clue how to withdraw from your balance in your Dapper Wallet to Canadian Dollars or exchange it for other cryptocurrencies. I will try my best to explain and give step by step instructions on how to do this.
What is NBA Top Shot?
If you do not know what NBA Top Shot is, you basically have a mashup between the NBA x NFT where you can buy/sell “Moments” of essentially highlight reels which are powered by a Crypto Blockchain. Like trading cards, these Moments are numbered (ie: 1/2021). In order to get these Moments, you can either buy them on the NBA Top Shot Marketplace, have another user gift them to you or by buying and opening Packs. How do you get packs? When pack drops are announced, users can join the drop at a designated time and wait until the designated time starts. Please note that some pack drops may have pre-requisites in order to participate. When that comes, NBA Top Shot will randomly assign everyone in the drop into a Queue. They find this is the most fair for everyone. Once you are assigned a spot, you wait your turn until the number goes down to 0. If there are packs still available, this is when you can buy a pack via your credit card. Now it isn’t as simple as ABC. Some pack drops may have a low quantity (especially if they are premium packs). So say for example, a premium pack drop has only 32,000 packs available and there are 200,000 users in line, if you are not around the 32,000 position in the queue, the chances of you getting a pack is very, very slim. Once you have purchased the pack, you can open it and see what Moments you got.
What are an NFTs?
Don’t know what an NFT is? If you’ve heard about Crypto Kitties or Crypto Punks, those are NFTs. I think it’s best to provide an Investopedia link to fully explain NFTs or watch this 2 hour long YouTube video by Engadget. And if you don’t know what Cryptocurrency is, then I suggest you head over to YouTube and watch the countless videos on virtual currencies.
How do I convert my balance into Canadian Dollars?
So you’ve sold some Moments and you have some money in your Dapper Wallet and now you have no clue how to convert that money into Canadian Dollars. For our fellow Americans, they can just link their US bank account and transfer their balance. Dapper Labs has recently added the ability to transfer your balance to your Canadian bank account, however, there is a big 25 USD service fee. OUCH! The option is there, but I feel going through the crypto exchange, will save you a lot in services fees.
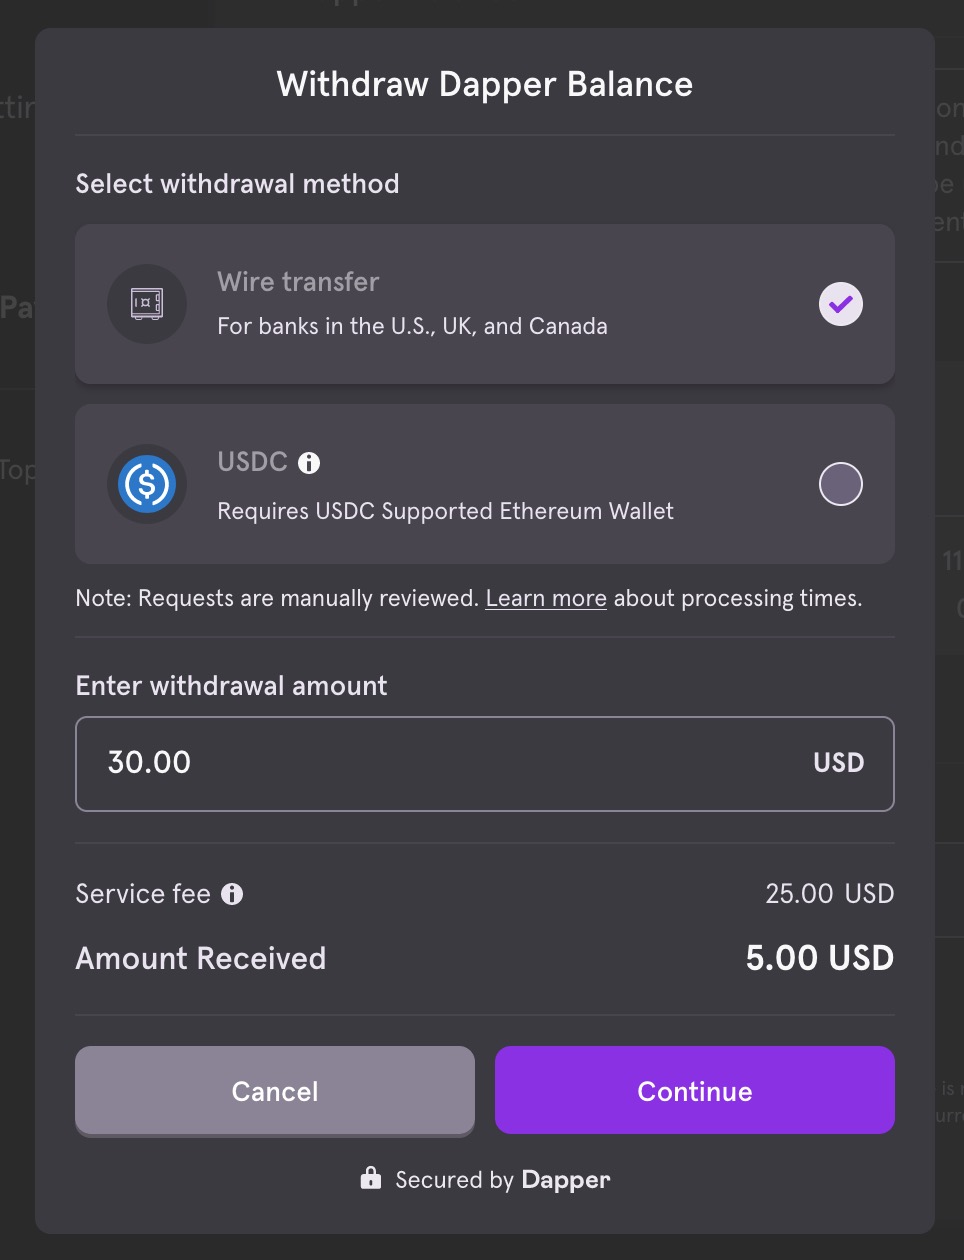
In order to understand the withdraw process, NBA Top Shot has provided an FAQ on how this all works. Click here to view it. Now I know this might be new to some of you and a little bit scary, but it’s not so difficult and bad as you think. Alternatively you can transfer your Dapper Balance to other cryptocurrency exchanges to swap them for other cryptocurrency coins or tokens. Both with be explained with their own guides below.
Guide to convert your Dapper balance to Canadian Dollars
If you want to convert your Dapper balance to crypto, you can go to this section.
Note: If you convert your cryptocurrency to Canadian Cash, you may be subjected to capital gains/losses during tax season. I don’t know how stringent the CRA is when it comes to claiming your crypto gains, but I would definitely keep track of this just in case!
In this guide we will explore how to convert your Dapper balance to Canadian dollars by way of a Canadian cryptocurrency exchange called Newton. In a nutshell, the way it works is you will withdraw a cryptocurrency called USDC from your Dapper wallet and deposit it into your account on Newton. From there you will convert the USDC into Canadian Dollars and Interac the money to yourself.
So what is USDC? USDC, much like USDT is called a “stable coin” where each USDC is backed by 1 US Dollar. These coins are primarily used to “protect” your crypto value. For example, you think that the crypto market is going to crash and you don’t want to convert your crypto into cash. What you can do is convert your crypto to USDC/USDT so that you can avoid the losses but keep your crypto within the cryptocurrency space.
Step 1: Sign up for Newton Exchange
First thing you need to do is to be signed up on a Canadian crypto exchange that you can convert your USDC into Canadian Dollars. If you are currently signed up for an exchange that can do the above then you can skip to step 3. However, if you are not signed up, I recommend using Newton.co. Newton is a Canadian Exchange that prides themselves with No Fees. Instead they just take a spread when buying and selling cryptos. My referral link (https://web.newton.co/r/TLHIWK) has an added bonus for you and me where if you buy or sell $100 CAD or more, we both get $25 CAD.
Once you’ve completed the sign up I believe Newton will ask you to verify your email. After this you should be able to log in.
Step 2: Verify your Identity (KYC)
Similar to how you need to verify your identity to transfer USDC out of your Dapper Wallet, you also need to verify your identity on Newton. Unfortunately, I do not have screenshots for this step as I have verified myself before this guide. If you follow the instructions, you should be good.
Step 3: Retrieve your USDC Wallet address on Newton
Now that you’ve verified yourself on Newton and Dapper, you now need to retrieve your USDC Wallet address on Newton. In order to do this, go to the main dashboard on Newton and click on the “Add Funds” button.
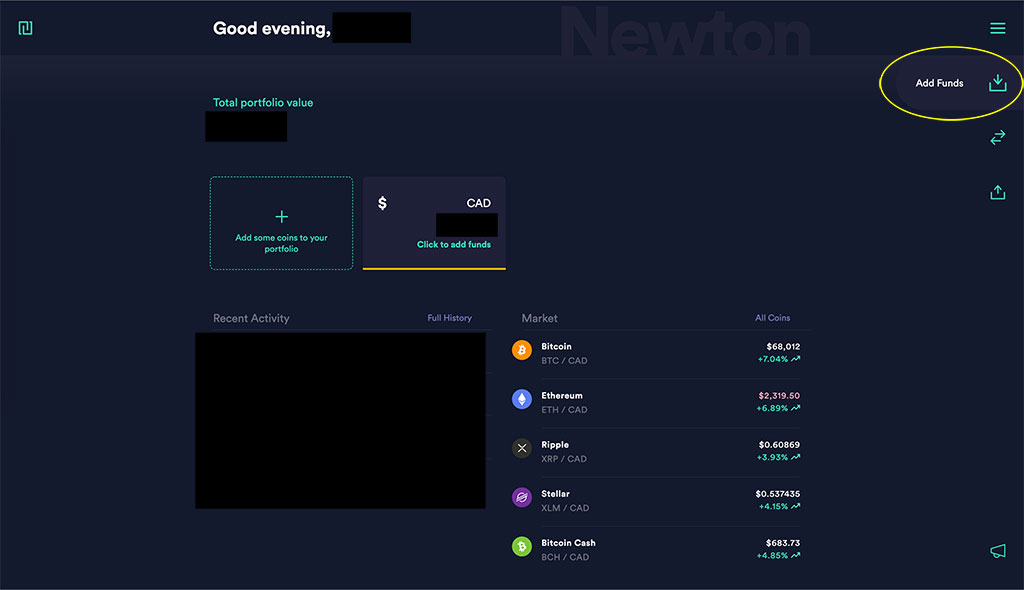
Once you’ve clicked “Add Funds” a new list of options will appear. Click on the “Crypto from Wallet” button so we can retrieve the USDBC Wallet address.
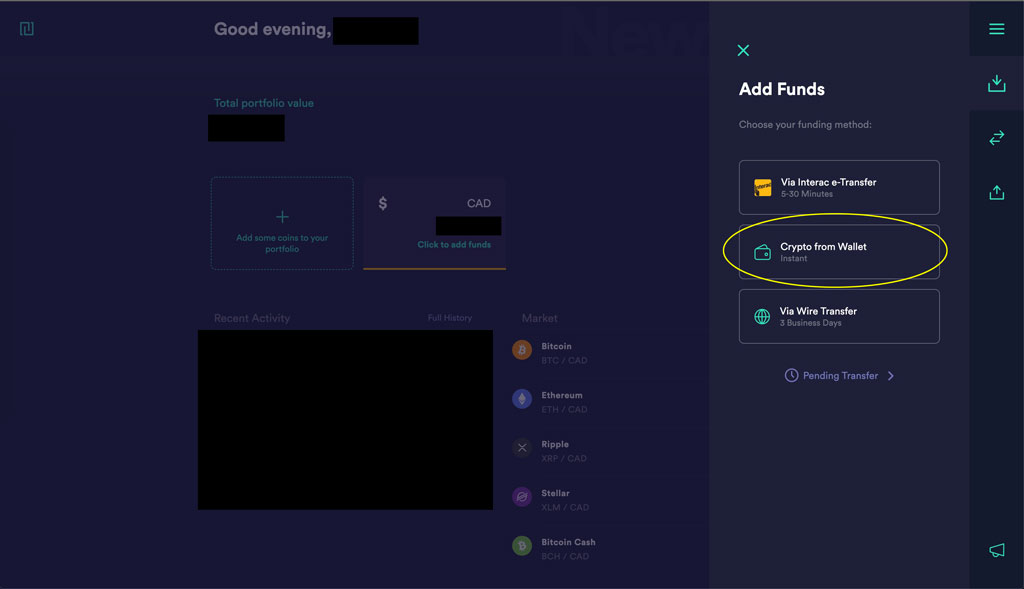
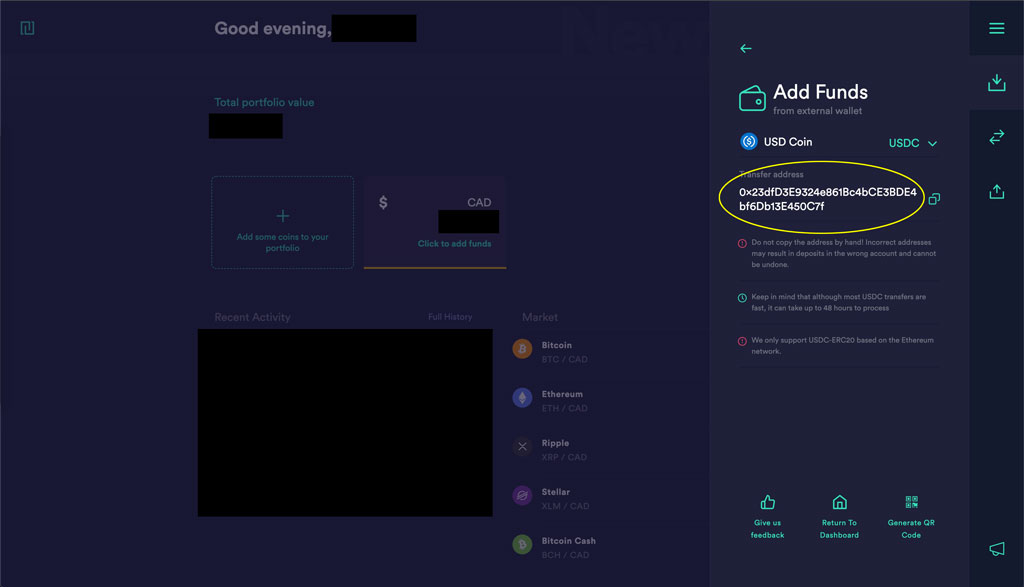
Once you’ve clicked “Crypto from Wallet”, you will now be able to see your wallet addresses. You will need this address to send your Dapper balance to Newton. You will see a dropdown menu. In my example below, I have it as “USDC” already. If it is not USDC on yours, click the dropdown and select “USDC”. Now you will see your USDC wallet address. You can copy it by clicking on the icon next to the wallet address. Everyone will have a unique wallet address.
WARNING: In the example below is my USDC wallet address. DO NOT USE THIS ADDRESS TO SEND YOUR DAPPER WALLET BALANCE. I will not be held responsible for any errors made.
Step 4: Verify yourself on Dapper
Now it is time to transfer your Dapper balance to Newton. First thing first is that you must get verified by Dapper in order to transfer your balance. Now Dapper has been slowly verifying users and it may take as much as 4-6 weeks to be verified, so please be patient.
If you are the lucky user who is ready to get verified, you can follow the steps below. If you are already verified, please skip to Step 5.
Start the verification process
To begin, go into your Dapper Balance from NBA Top Shot. Click on your profile avatar on the top right of the site and click on “Dapper Balance”. This will redirect you to your Dapper Wallet.
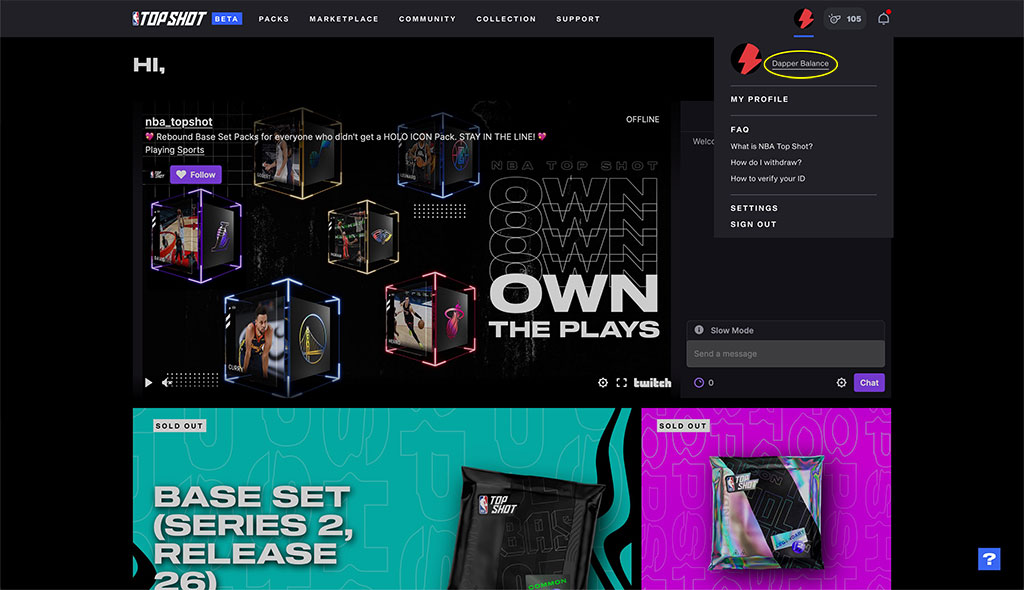
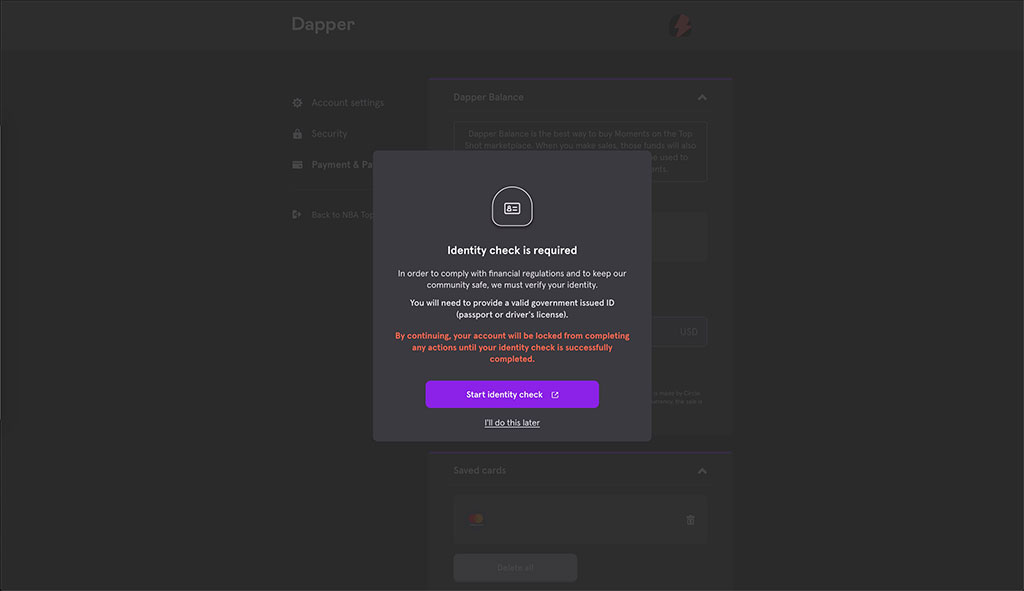
Once you are in Dapper, click on “Withdraw Balance”. If you are not verified, you will begin the verification process if you are eligible. Make sure you have your government issued ID ready. This can be a driver’s license, passport or some other form of government issued ID. When you are ready, click on the “Start Identity Check” button.
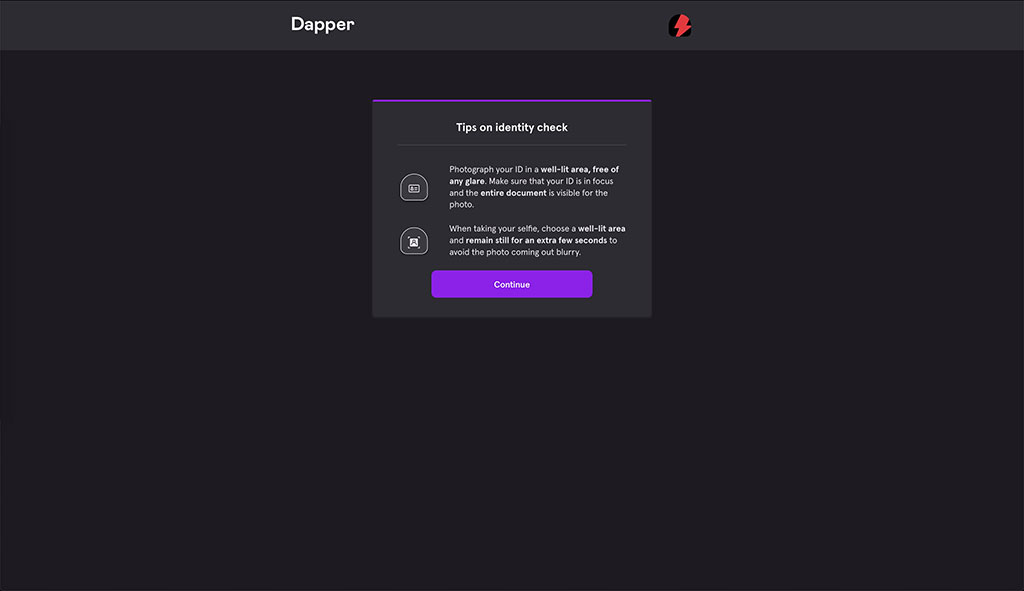
Dapper will next give you tips on how to take photographs. My suggestion would be to use your phone and upload the pictures to your computer. Your computer’s web cam may not provide the clearest image. When you are all set, click the “Continue” button.
Select which ID you will verify with and take pictures to send
The next screen will have you select which ID you will be using. Make sure your country/region is Canada.
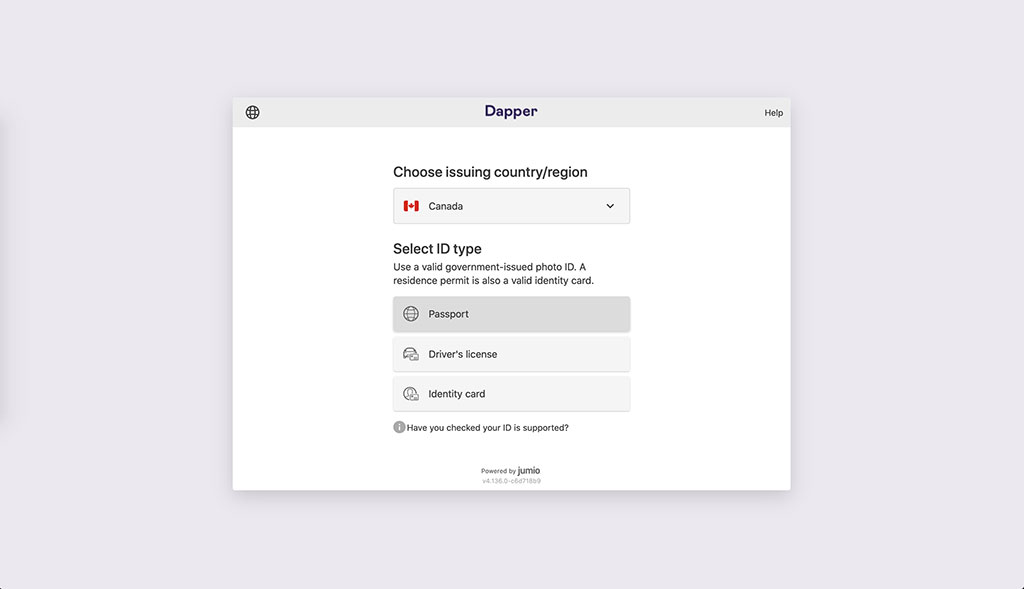
In this example, I have selected to use my Driver’s License. The next screen will ask you to provide photos of the front and back of the license + a selfie of yourself. You have three ways to do this.
Take Photo – You will use your computer’s camera
Upload file – You will select images from your computer to upload
Prefer to use your mobile? – I think this option will provide you a QR code or link so you can open a link on your phone and you can take pictures and upload from there. (I did not pick this option, so i’m not 100% sure)
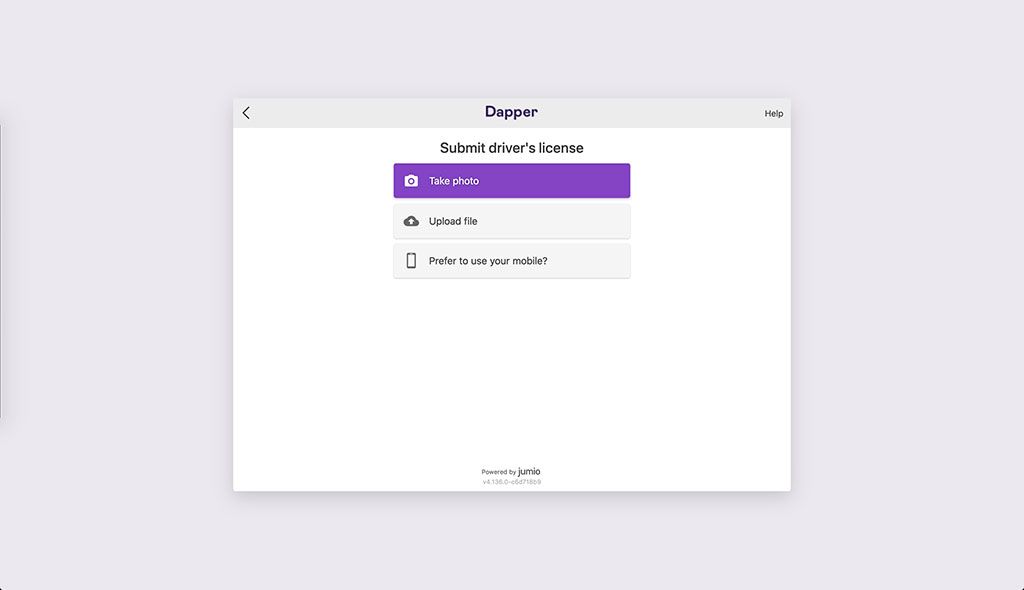
Just a quick note for driver’s licenses. When i submitted the back of my license, it said it could not find the bar code. You can just skip this and it worked.
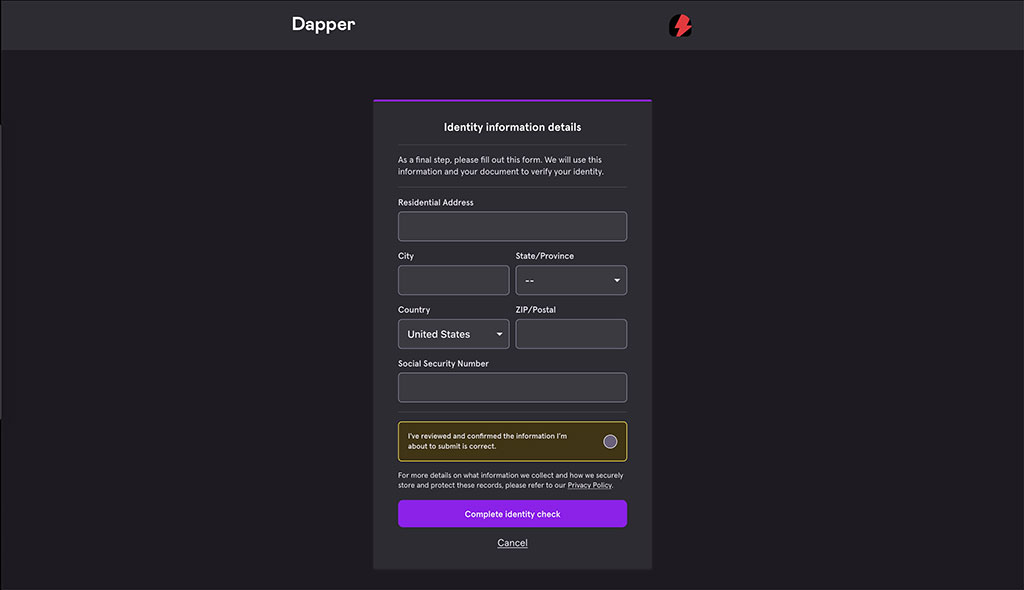
Fill out your home address and Social Security Number
Once you have passed the photo step, you will be redirected to enter your home address and Social Security Number. Fill out this section and make sure you click the checkbox (I’ve reviewed and confirmed the information I’m about to submit is correct). Click on the “Complete Identity Check” button to finish the verification process.
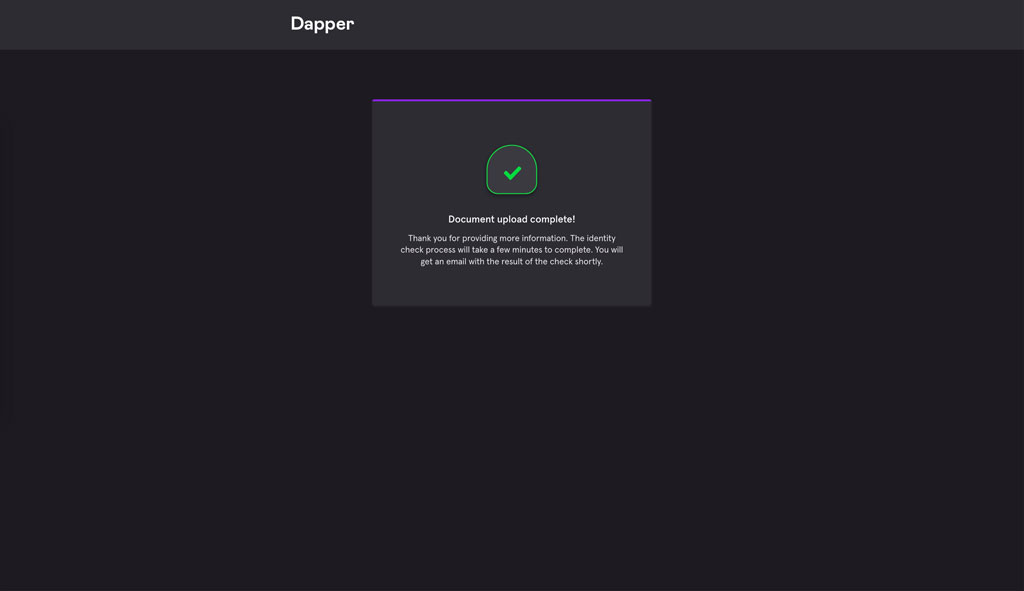
TADA! You have completed the verification process. Now, you will be sent an email from Dapper saying you are verified. Once this is sent, go back to the Dapper Wallet homepage and it is time to transfer your USDC to a Crypto Exchange.
Step 5: Transfer your USDC to Newton
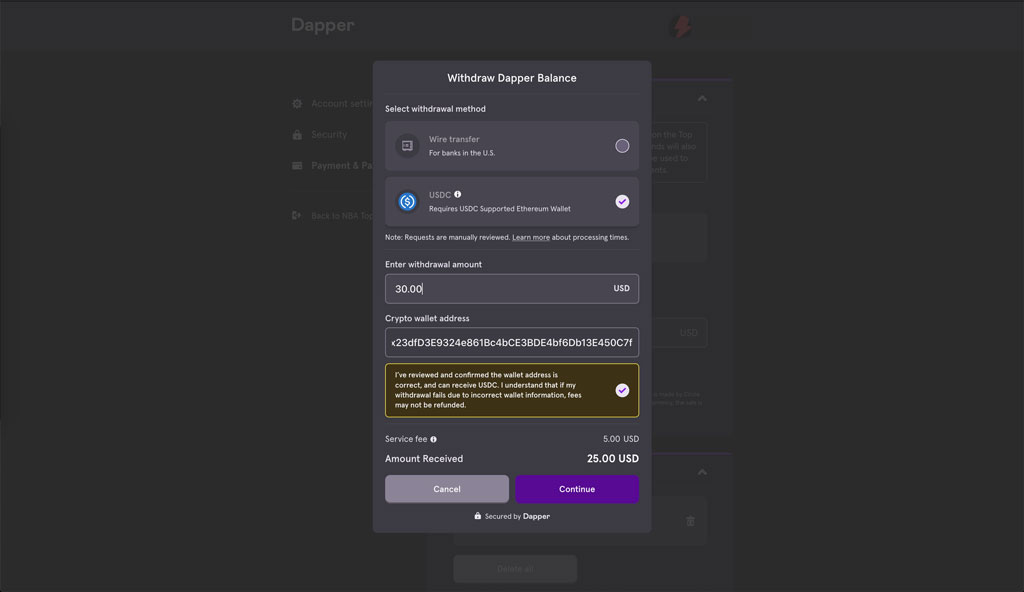
So remember that Crypto wallet address that we copied at the end of Step 3. Now it is time to enter that wallet address in “Crypto Wallet Address” below in the screenshot. Please, please, please make sure that the wallet addresses match up. If you are even off by one character, you will lose your USDC. Also make sure there are no spaces before and after the wallet address. You should be ok if you click on the copy icon from Newton.
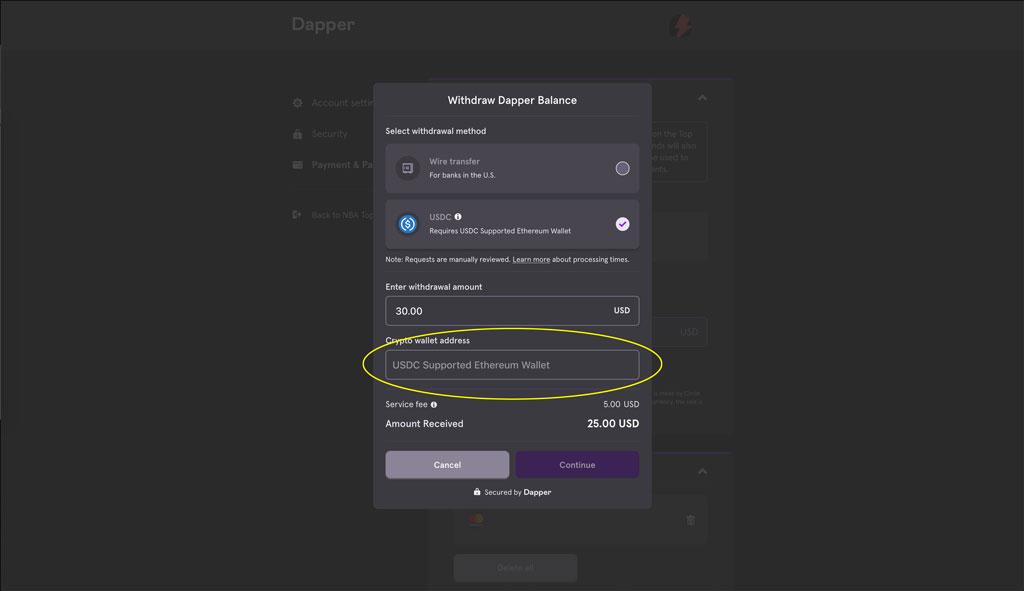
You must withdraw an amount greater than or equal to $30 USD as this is the minimum. Also note that there is a $5 USD service fee. This is to cover gas fees when transferring crypto from point A to point B. This is standard in the crypto world.
After entering your crypto wallet address, a warning will appear. Check the checkbox and the “Continue” button will be clickable. When you are ready, click on the “Continue” button.
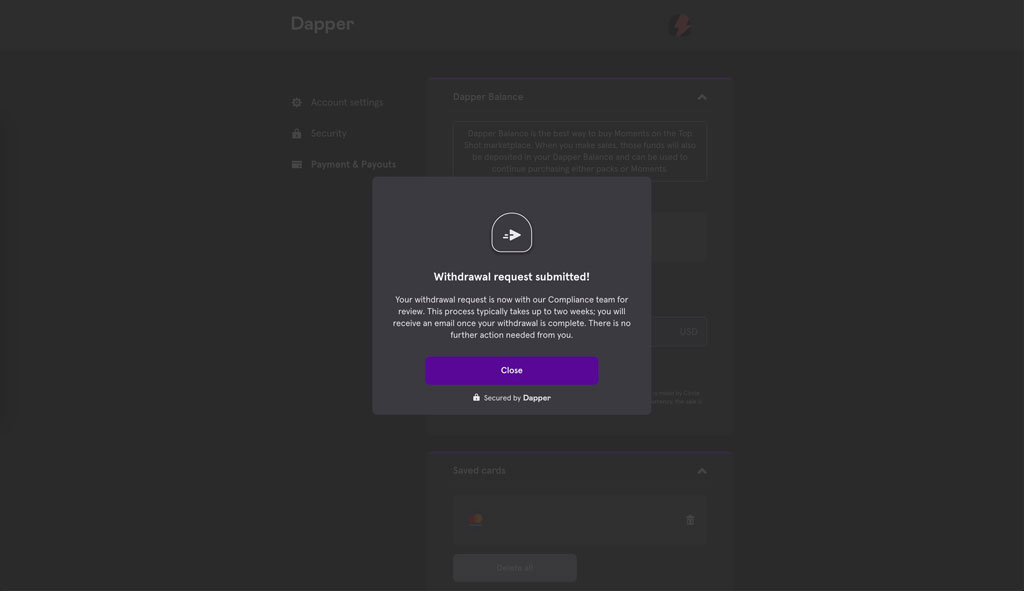
After clicking the “Continue” button, you will get a confirmation message. Now, it appears that Dapper has a review process that takes up to 2-4 week! WHAT!!!!!!!!!!! You will get an email verifying that you have started the process and another email when it is complete. Bummer!
Step 6: Trade your USDC to Canadian Cash
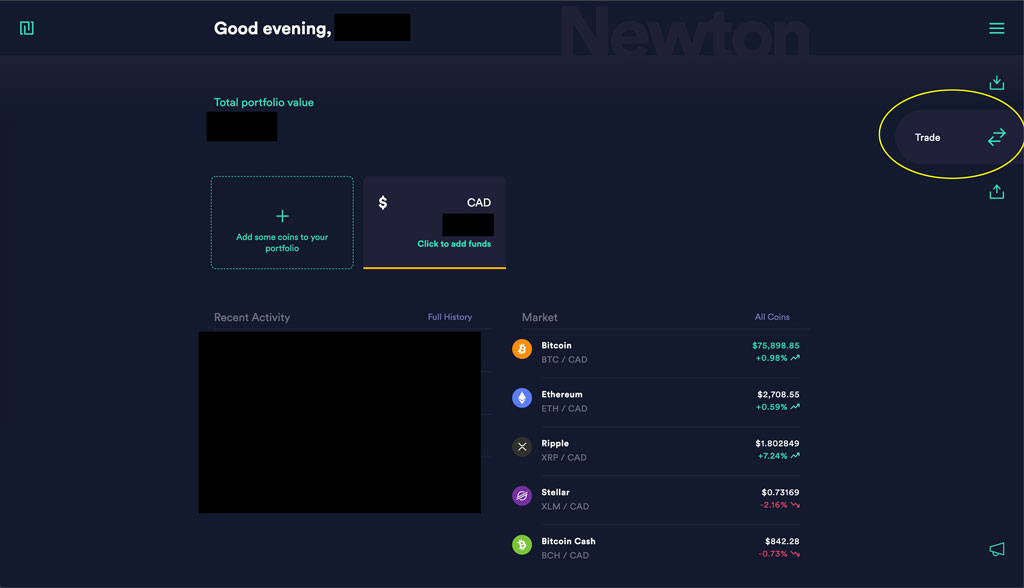
As you wait patiently for your USDC to be transferred to your Newton account and it arrives, you can now convert your USDC to Canadian Cash. First, go back to Newton and click on the “Trade” button on the right.
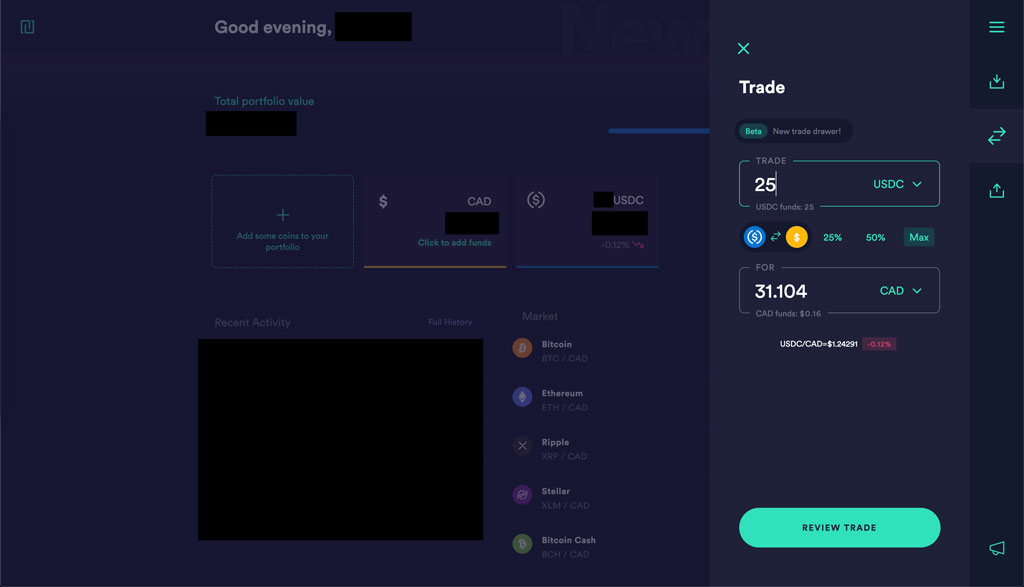
Next, make sure the “Trade” input is “USDC” and the “For” input is “Canadian Cash”. You can now enter how much you want to trade. When you are ready, click on the “Review Trade” button.
You will then get a confirmation popup. If you are good, click on “Buy CAD” button.
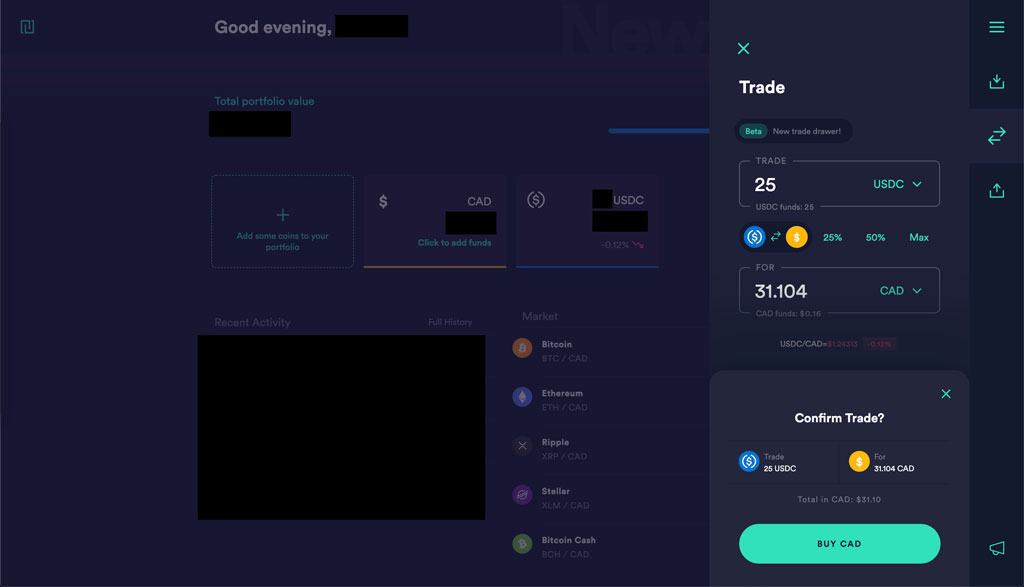
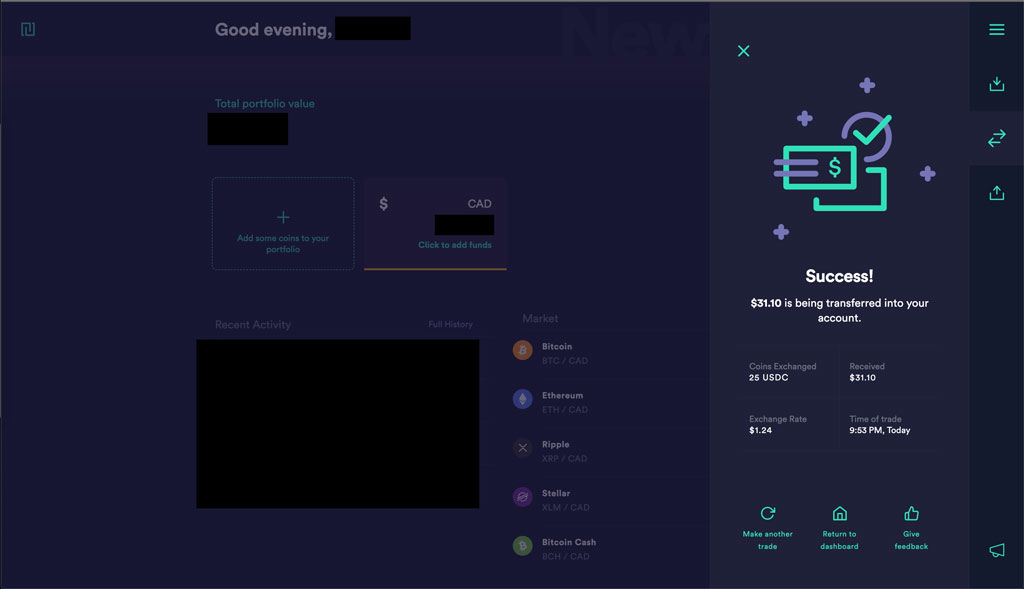
Once this is complete, you should now see a success message and your USDC has been converted to Canadian Cash.
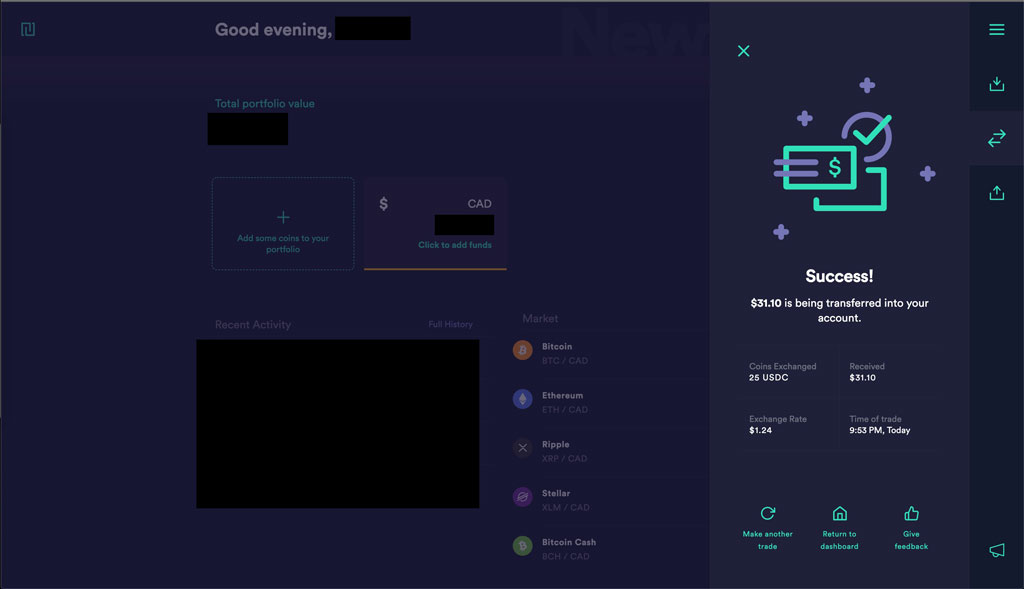
Step 7: Withdraw your Canadian Cash via Interac e-Transfer
Finally, we can now transfer your Canadian Cash via Interac e-Transfer. Click on the “Withdraw” button on the right.
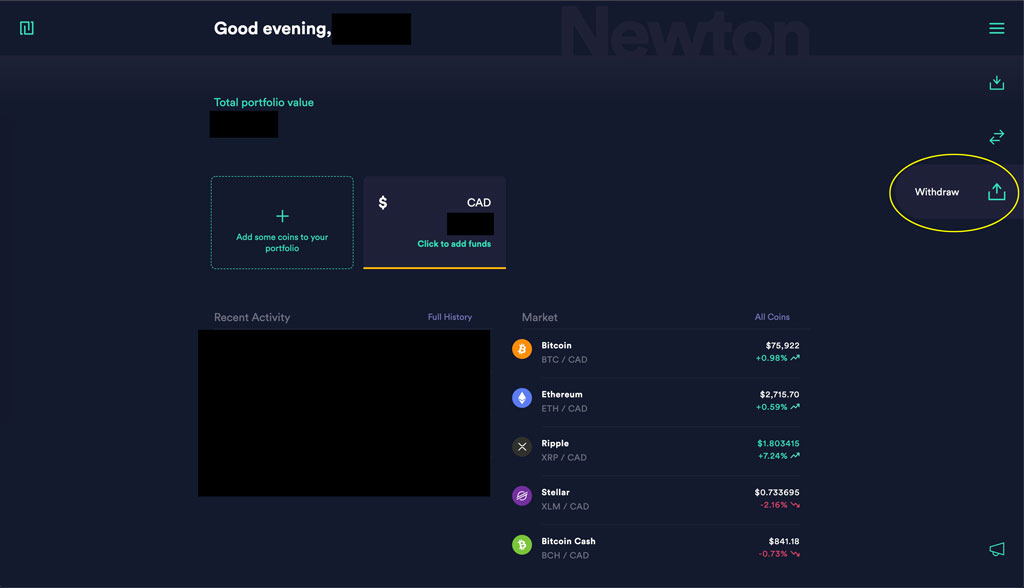
Next, select “Via Interact e-Transfer”. You can also select “To Bank Account” if you set this up. I find e-Transfer faster and easier.
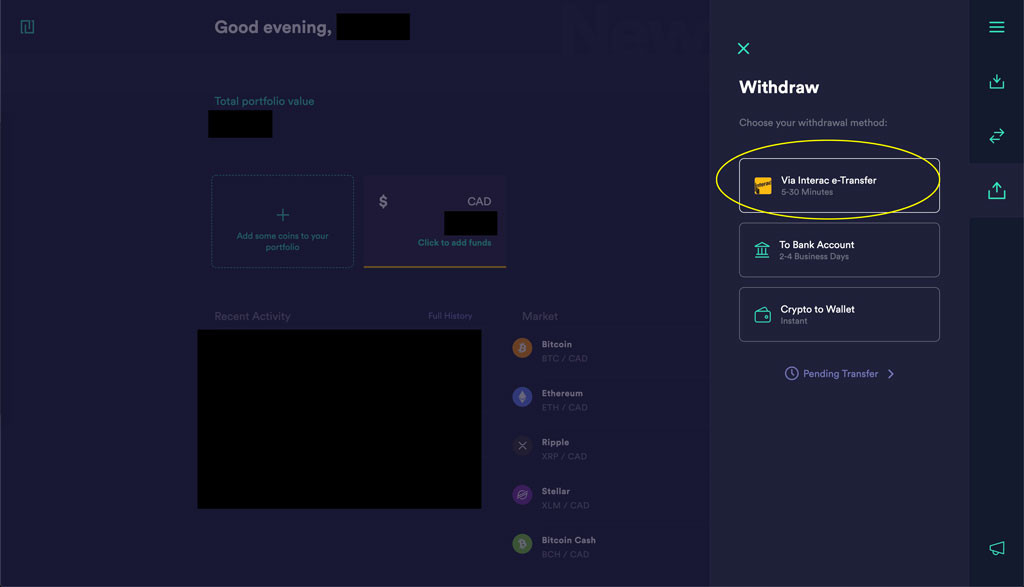
Next, enter the amount you want to send. Make sure the email is correct as well. You must send at least $10 Canadian Dollars. When you are done, click on the “Review Withdrawal” button.
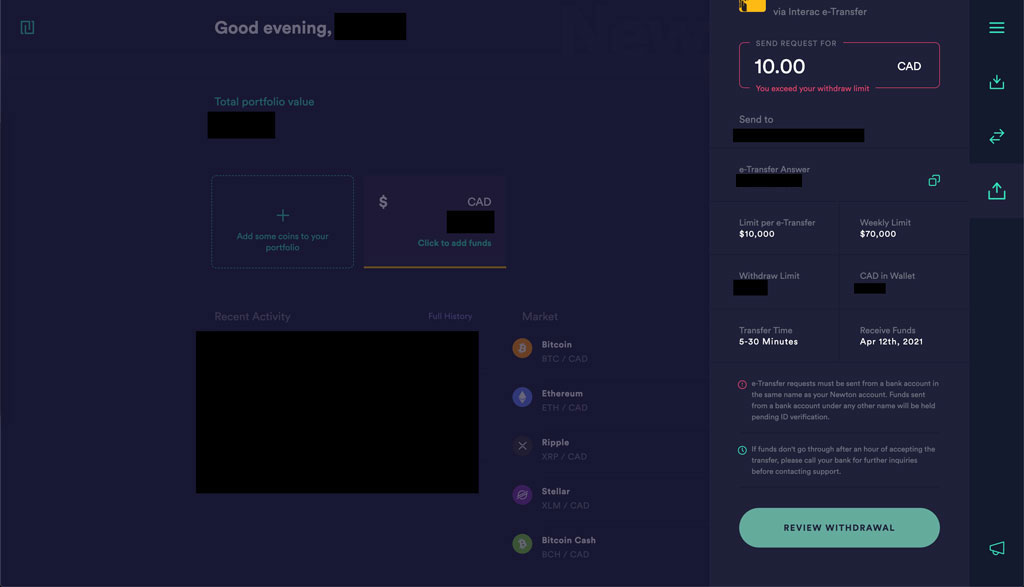
Once you have clicked the “Review Withdrawal” button, you will get a confirmation popup. When you are ready, click on the “Withdraw CAD” button.
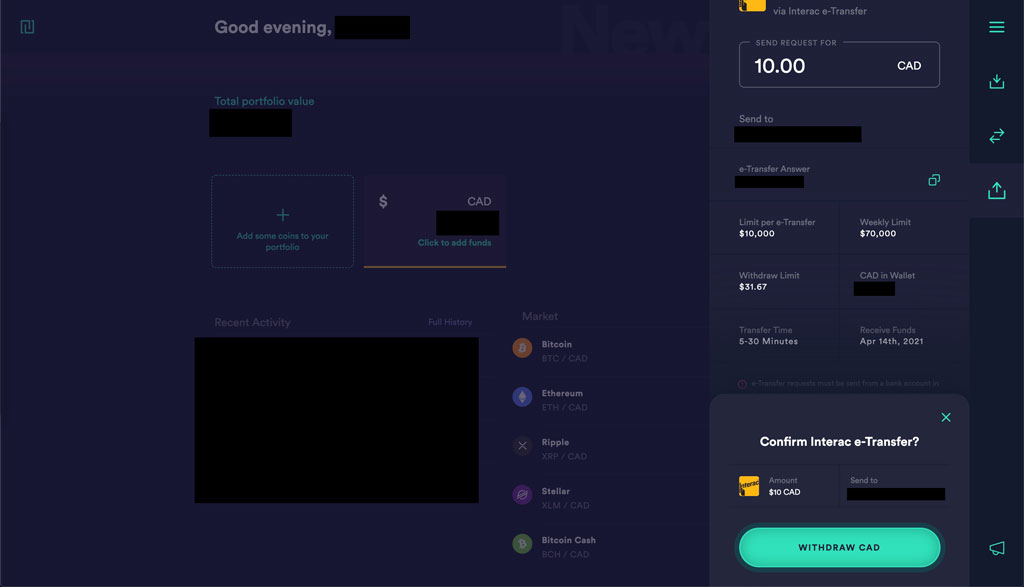
If everything is good, you will get a success message. Now, wait for the Interact e-Transfer email to be sent to you and the rest should be straight forward as if you were to receive an e-Transfer some an individual.
Guide to convert your Dapper balance to other Cryptocurrencies
Now, suppose you do not want to convert your USDC from your Dapper wallet to Canadian Dollars, but instead you want to invest in other cryptocurrencies. There are a ton of options out there in terms of exchanges and cryptocurrencies to invest in, but again, PLEASE DO YOUR OWN RESEARCH! Cryptocurrencies are highly volatile so if you can’t handle the rollercoaster rides, I would not advise investing into cryptocurrency.
But if you want to, here are some helpful links and an exchange that has access to a lot of cryptocurrencies to invest in.
Binance Exchange
Binance Exchange is one of the biggest cryptocurrency exchanges to date. This is a great place to buy some of the most popular cryptocurrencies and some altcoins or tokens that you have never heard of.
You can use my referral link (https://www.binance.com/en/register?ref=12231617). Transferring your USDC to Binance is the same as transferring to Newton. You just need to get your Binance USDC Wallet Address.
To get the USDC wallet address, first, log into Binance. Note: I highly recommend you enable Two Factor Authentication. Click on “Wallet” and select “Fiat and Spot”
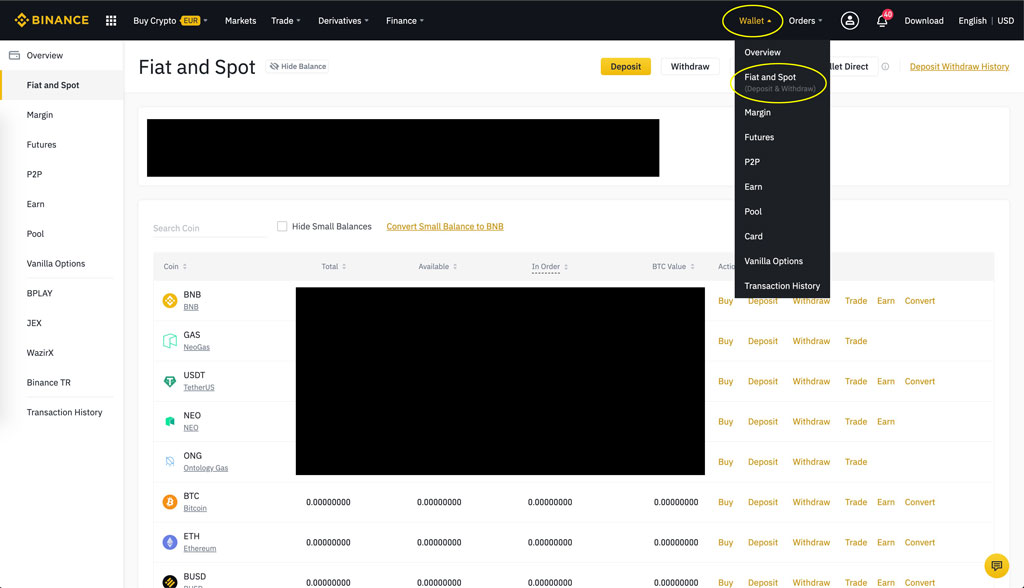
Next, use the “Search Coin” search and enter USDC. Then click on “Deposit”
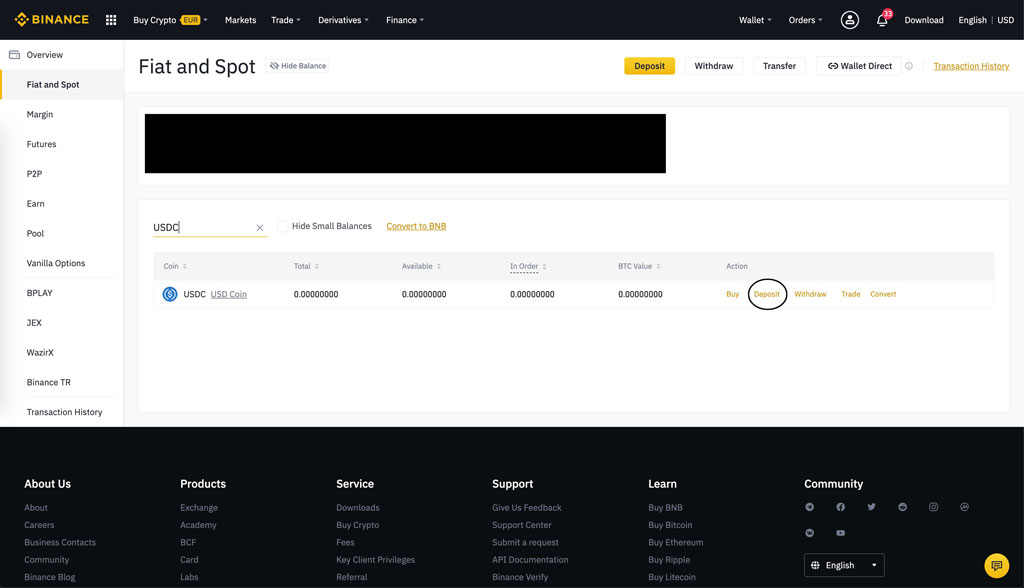
Here you will find your USDC Wallet Address on the right. You can click on the copy icon to copy it to your clipboard. See screenshot below.
WARNING: In the example below is my USDC wallet address. DO NOT USE THIS ADDRESS TO SEND YOUR DAPPER WALLET BALANCE. I will not be held responsible for any errors made.
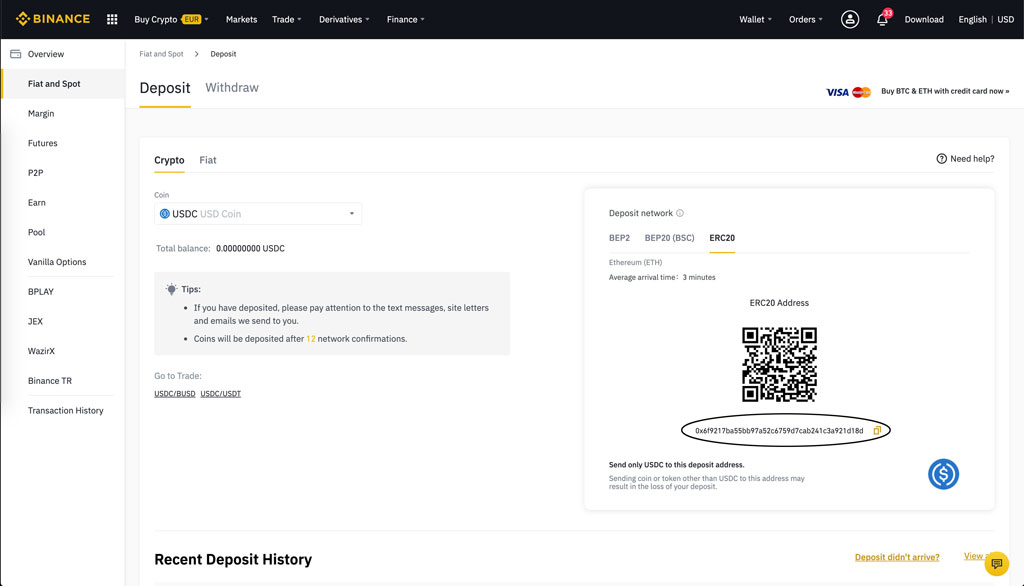
That’s it. Now you can send your USDC from dapper to Binance and start trading for other coins and tokens.
CoinMarketCap
CoinMarketCap is a website that has cryptocurrency prices. You can search up which coins or tokens you want to invest in and find out which exchanges you can buy them on. This is a really good site to do some research. Link is here: https://coinmarketcap.com/
If you have any questions, don’t hesitate to contact us at: npnoffers@gmail.com.
